Monday, May 2, 2016

Engraving of  a Custom Ruger #1


At the Dallas Safari Club  (Dallas, Texas) show and convention in 2015 my friend and client Mr. Jacob found a custom Ruger #1 at the Griffin and Howe booth. We discussed the possibility of engraving this rifle. It was decided that this rifle would be a good candidate for a project especially since it had better than factory stocks and metal upgrades.

The people at the Griffin and Howe booth could not give us much information on the rifle. All they knew was that the rifle had been ordered by a local Safari Club International chapter.

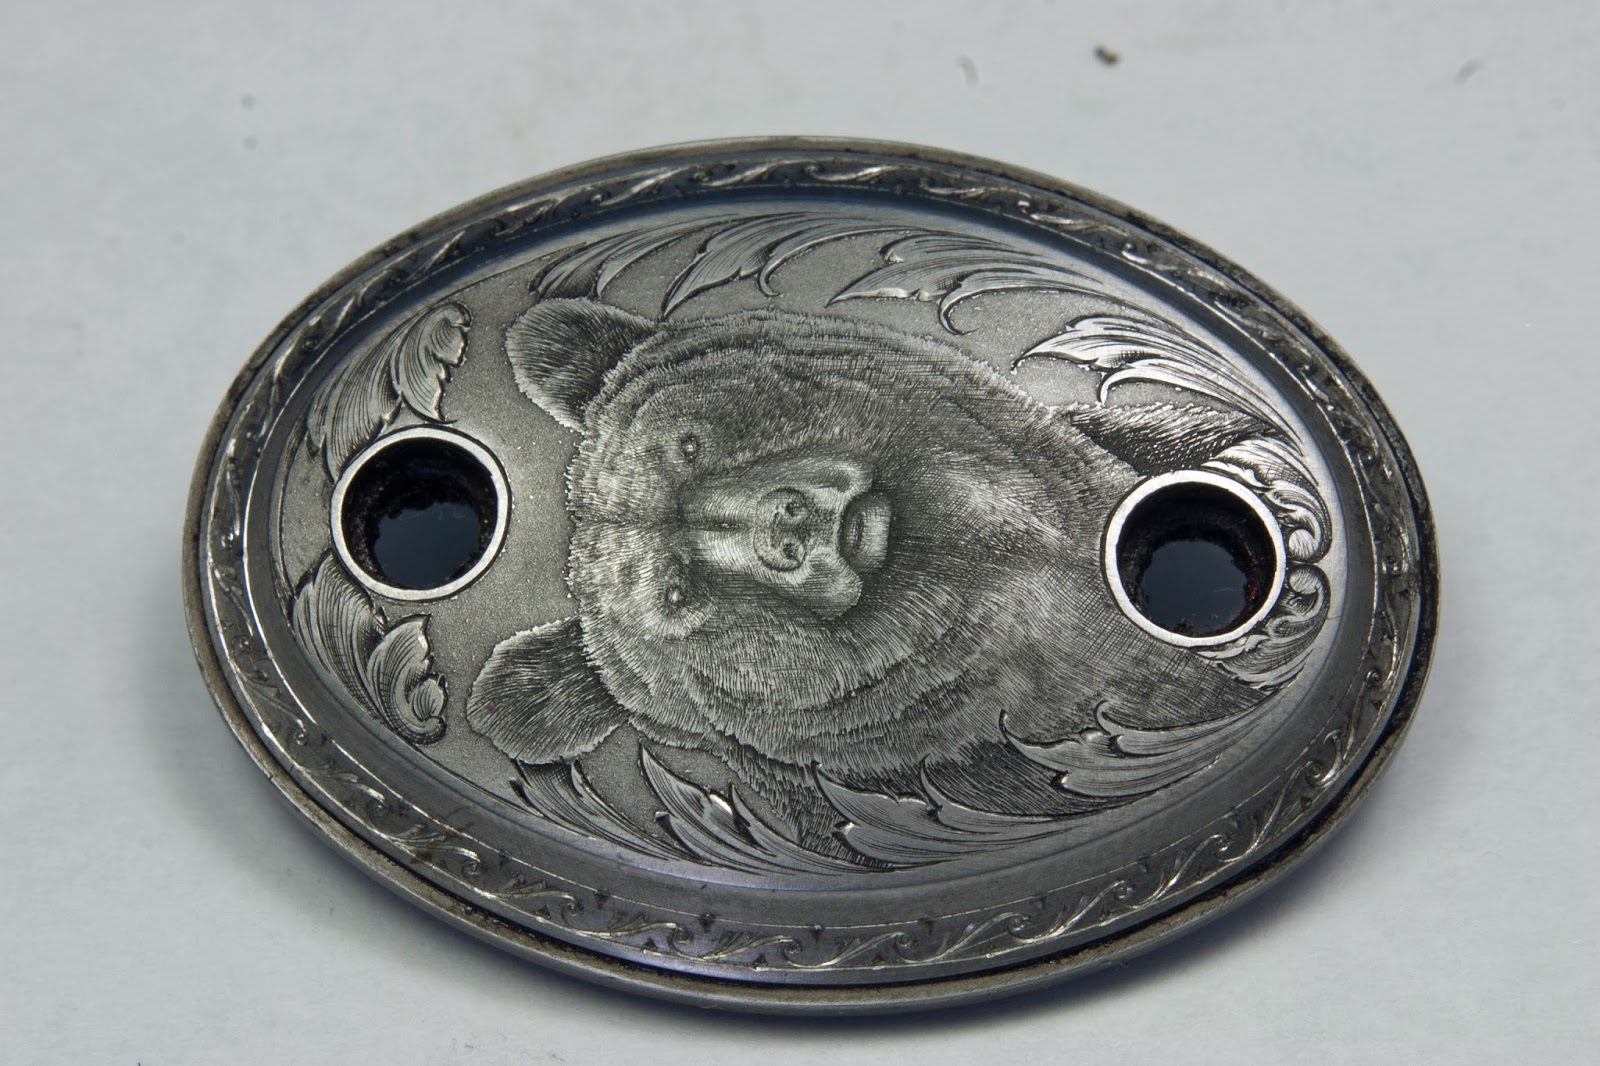
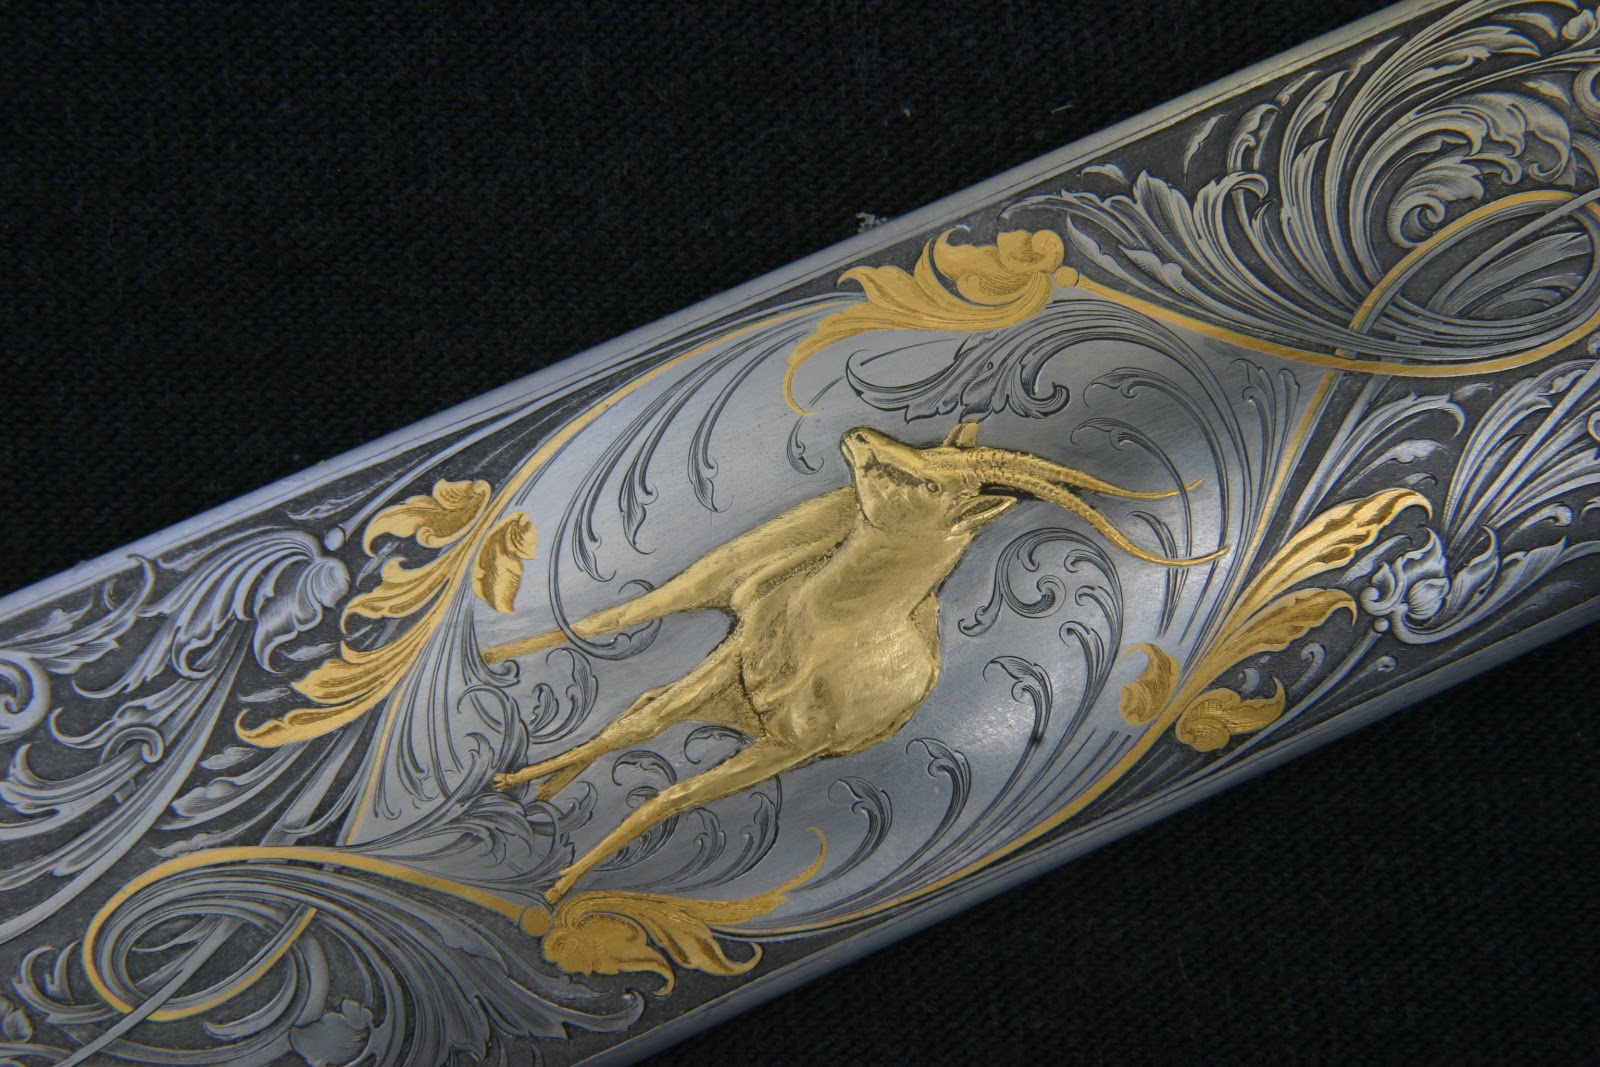
The purchase was made. We discussed what would be engraved on the rifle, the bust of an elk  on one side of the receiver and a moose on the other side of the receiver.  A bear was to be placed on the grip cap. Scroll would tie it all together. The rifle was shipped to me not long after everyone had returned to their home bases.

Upon taking the rifle apart I found the James Tucker (Medford, Oregon) had stamped the inside of the forearm with his information. I relayed this information to Mr. Jacob. Fast forward to 2016 where at the Dallas Safari Club show and convention we talked to James Tucker about this particular gun. Some of the blanks were filled in as to how this custom rifle came about.

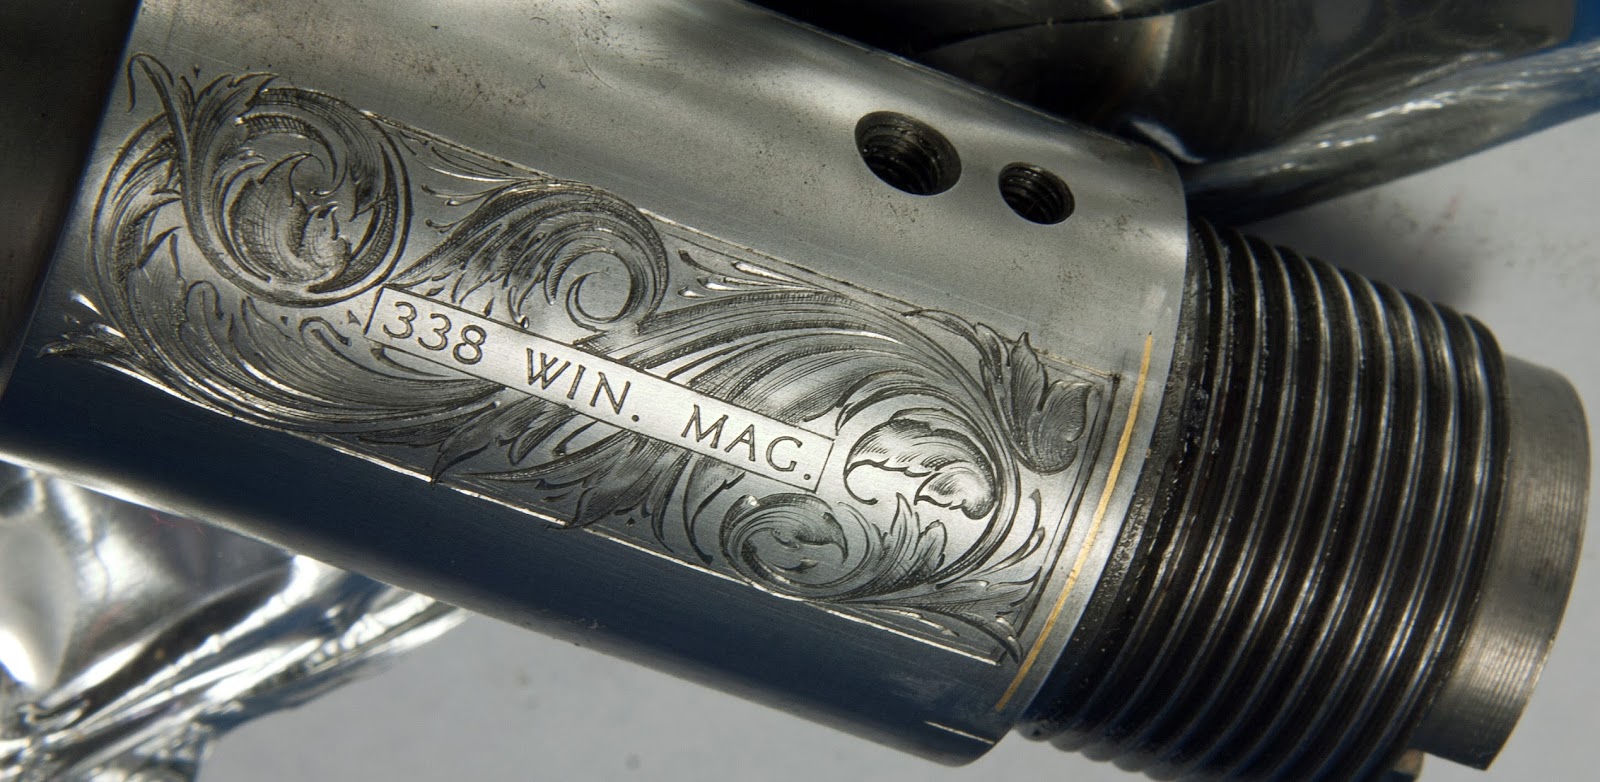
This Ruger #1 started as factory barrel action in caliber 338 Winchester Magnum. It was ordered by the Metro Chapter of Safari Club International in December of 1986. This custom rifle was finished in October of 1987. Stephen Heilmann (Grass Valley, California) turned the barrel, installed the sights and barrel band front sling swivel, made a new trigger and safety. The wood for the stock was donated by a club member. James Tucker machined the front of the action for a better forend look, did the forend screw set-up, made the stock and forend, final polish and assembled it. Originally the rifle was to be engraved, that did not develop. The rifle was rust blued by Duane Bolden.

We now know where and how this custom rifle came about. Twenty-eight years later it is in the stages of being engraved. I did some rough sketches on the gun to get ideas. I then did some on paper to send to Mr. Jacob. The OK given I was then ready to get serious. The rifle was completely disassembled and stripped of all blue. The Ruger was in pristine condition so no major polishing was needed.

Most of my lay out and drawing is done on the gun itself. When requested I do supply sketches with the understanding that it may be different once it is engraved on the gun. These sketches are just ideas and to keep heading in one direction. I will spend considerably more time on drawing out the animals on paper then transfer using my Cronite pantograph, which just gives a scribe outline that I then need to follow up with engraving.

With the receiver having been annealed it was time to start. I first lay out all my scroll work with pencil. I then work my animal in with pencil adjusting the scroll where I need to. When engraving different antlered animals within a scroll pattern the scroll sometimes needs to alter from side to side. I then engrave the scroll. If it will work for me I will do all the scroll before I start the animals. Gold was not an issue on this rifle as there would only be a gold band on chamber end of the barrel.

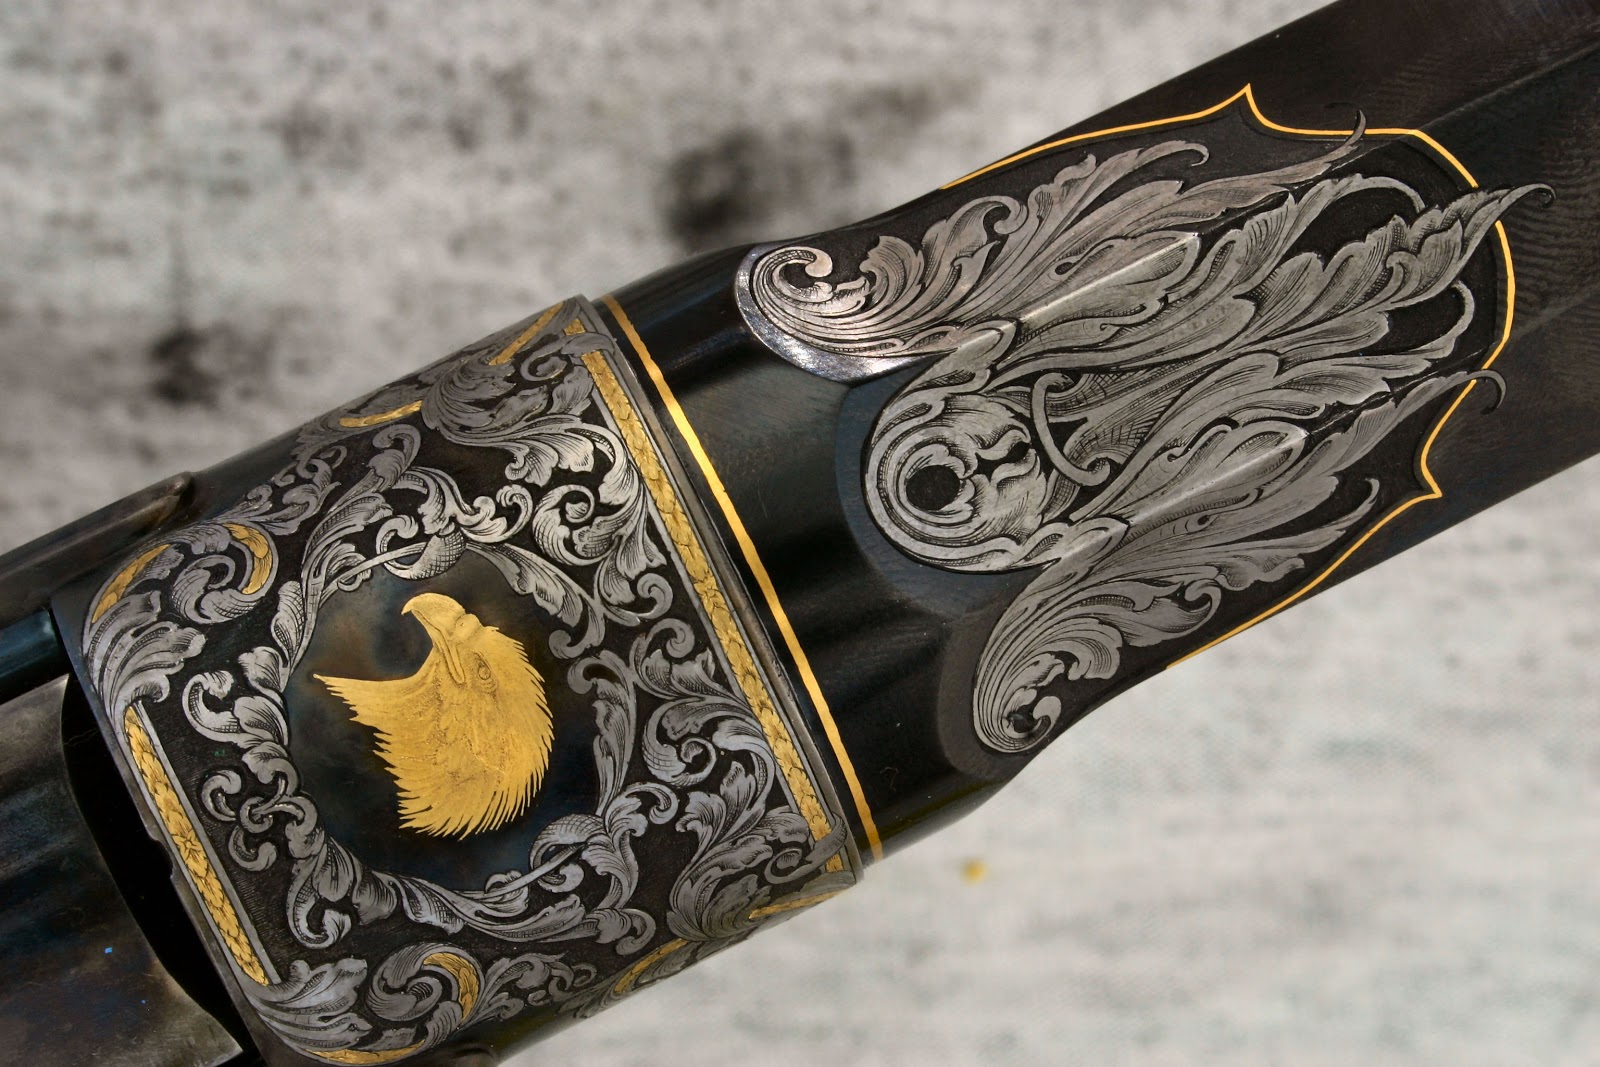
The scroll was my style of an Arabesque scroll. I used lines as shading for some of the background around the scrolls on the sides of the receiver. For the rest of the engraving there is no background treatment. The animals and scroll are all engraved with lines. Some of the lines being so short they are more dot than line. For most of the engraving a 90 degree square graver is used. My gravers vary  from 70 degrees to 110 degrees to help me get the desired effect. For the real fine shading, which is usually all the animal and most of the shading in the scroll, I use the palm tool and push only.

The finish blue was done by Glenrock Blue (Glenrock, Wyoming). I did the French grey on the sides of the receiver. A set of Tally rings were purchased. These of course were engraved to tie in with the rifle.
                                            Moose drawing.


                                              Bear drawing for the grip cap


                                               Elk drawing for the other side of the receiver


                                              Drawing, out line of the action. Layout for the scroll with the moose.

                                        The scroll engraved with the moose scribe in and ready for engraving

                                 Left side of action engraved                    

                                 Right side engraved

                                      Finished grip cap with bear and scroll engraved

                                     Front sight hood engraved with scroll

                                    Rear sight on quarter rib, gold  line inlaid and scroll added.

                                       Side of quarter rib engraved
                                       Chamber end of the barrel
                                        Right side of the receiver and chamber area of the barrel

                                    Scope rings engraved


Saturday, December 31, 2011

Scabby Bull

Here is an engraved print that I did of Scabby Bull an Arapaho. I ran across a picture of him while I was researching ideas for the Colt Collectors Association 2012 revolver that I have engraved. To me he looked stately and respected. The steel plate size that the engraving is done on is 2" X 4". My daughter and grandson helped me with the printing of the engraving.

Thursday, September 1, 2011

Engraving, The Art of Lettering

One of the things that most engravers learn early in their career is lettering. Lettering is mechanical as well as being an art. When engraving block letters it is more mechanical for the layout and cutting. Skill and control of the tool is involved in the cutting the letters.  All the letters need to be cut the same height with the bottoms of all the letters level and on a straight line. Letters like the O will need to be so very slightly above and below the lines. Letters like the A will need to be slightly higher than the top line. Other letters that this applies to are the C,G,J,M,N,O,U,V, and W. If this is not done then these letters appear to be smaller.

When the engraver does script, old English, leaf letters, scroll letters, etc. this is where the artistic touches come into play. Quite often the engraver can add touches of art to these styles.

The gravers used for lettering are square, flat, round and liners. The type of graver to be used will depend upon the style of lettering. Square gravers can be used for all styles of lettering. The flat can be used for script. The flat graver can give a very fine line to a wide beauty cut. The round gravers and also flat can be used for the block styles of letters. The liners would be for lettering styles that would be filled in or with multiple lines like that of a ribbon style.

There are so many variations  to lettering. The letters can be cut with  outlines and then filled in with vertical lines, horizontal lines, dots, or combinations. Shading lines can be added to the outside, usually to the bottom and right side. The shading depends upon the artist engraver. The letters can also be inlaid with gold which make them stand out on a blued gun.

Monograms are usually very artistic. Between the design, layout and engraving, monograms consume a lot of time to do. A monogram consists usually of three initials. The last name (surname) is placed in the center and larger than the other two initials. An example would be JBR for James Russell Blair.

I have always enjoyed chasing out or engraving the lettering on old English shotguns and double rifles. The lettering was done with a minimum of cuts. To me it is a very  pleasing slanted Roman style. It is cut quickly and  precise.

There are some rules that do need to be followed. When cutting script the engraver should follow the up and down strokes, from thin to thick lines. The use of power assists engravers can reduce or completely eliminate having to do the up and down strokes. When cutting a Roman style with serif, the serif should be cut first. This establishes the top and bottoms of the letters. These are only a few of the rules. Like all art work after learning the rules many can be broken.

The design (style) and layout can be accomplished many ways. The layout can be done by scribing guide lines on the the surface to be engraved. The computer can be used to do the layout and then printed onto a transfer. The printed transfer is then transferred onto the surface to be engraved. A pantograph can be used. Cronite Company pantographs were made to be used in the engraved stationary field. The pantographs are used to scribe  the letters onto the surface then the engraver engraves the scribed letter. This eliminated having to use guide lines.

The cost of lettering is usually straight forward, charging per character (letter). The size and style is what will establish the cost. The only variable may be where on the object and the hardness of the material to be engraved. Monograms will cost more because of the time involved in design and engraving. Gold inlaid letters add considerably to the cost.


This is just a very general overview. I probably have left you with more questions than answers. Whole books have been written on the engraved letter. One of the most important points to remember when engraving letters is spelling , double check and then check again. I welcome questions and comments.


Thursday, July 21, 2011

Gun Engraving, The Art and Craftsmanship of gold inlays.

Inlays can be of several different metals. They can be gold, silver,copper, platinum, iron or a combination. Gold is probably the most commonly used. Gold in its purest form (24k) is the easiest to work with. It is not the most durable. Most modern firearms that are engraved with inlays are not heavily used nor abused. As a general rule 18k is the lowest karate gold to inlay because of the difficulty in setting the inlay.

Inlays used on guns are of two types, flush or raised. They both require a cavity and are held in place mechanically. There are also overlays, damascene and plating. Plating is a in a different category. Overlays and damascene are similar in that they are held onto the gun mechanically but do not require a cavity cut into the gun.

The methods used by each engraver can vary somewhat but they all end up with the same results. Engravers will use different gravers to get the same results. It is a matter of personal choice and how the engraver has learned their trade.

To do a simple line inlay, first the channel is engraved to the width that the line inlay is to be. This engraved line can be cut with a square , a flat, an onglette, or a scorper. This engraved line needs to be undercut, similar to what we think of as a dovetail. This dovetail can be done several ways . Two ways to cut the undercut are with a knife graver or a chisel. A corresponding width and length of wire is then driven into the channel using a punch and hammer. If it is to be a flush inlay it is then shaved with a flat grave to remove the excess. Then the inlay is polished flush with fine stones or fine sand papers. The hard part is keeping straight lines straight and a very even width in the channel. This is accomplished with years of doing inlays.

When inlaying a larger inlay such as a bird. The bird is drawn out either on the gun or on paper then reduced and transferred to the gun. The out line is cut into the metal. An ink pull is done for future reference to refer back to for locating the edges of the cavity or for details on the inlay. The metal of the gun is then removed within the cut outline of the bird. The depth of the inlay is determined by being flush or raised. The under cut is done around the edges. Then a series of burrs are raised using a chisel. These burrs should be raised in at least three directions. The burrs should not be raised so high that they would come up through the inlay.

The inlay can either be wire or sheet. The thickness of the inlay material depends upon the depth of the cavity and if the inlay is to be flush or raised. Using wire, the wire is started on the outside edges set with a punch and hammer. This continues around filling the cavity until it is all set in. The inlay is then set in place with firmer hits from the punch and hammer. Now the inlay is either polished down flush or left raised and sculptured. If it is to be sculptured it is best to sand down just to the point of being smooth and level across the top, being careful not to take off more than necessary. Then the carving and sculpturing takes place.

To use sheet for the inlay, the outline of the cavity of the bird will be transferred to the sheet material.  A jeweler's saw is used to cut out the inlay. The cut out inlay needs to be able to drop into the cavity without any gaps or overlaps. Again the edges of the cavity need to be undercut and with the burrs raised inside the cavity. The inlay is then set into the cavity using a punch and hammer. The inlay is then ready for finish whether flush or raised. The sheet inlay is then finished the same as the wire inlay would be done.

Sometimes there is an advantage to using either wire or sheet for the inlay. Mostly it is the engravers preference that they use one over the other. I use both methods. It is usually a call I make just before doing the inlay. Sometimes I have found that it works to use both sheet and wire in the same inlay. One thing to remember is that if you are doing an inlay that uses different colors of gold or different metals in the inlay start with hardest metal. Inlay the hardest material first. Say you had silver and 24k gold to inlay in the same inlay. Inlay the silver first then do the gold.

This is just a very general overview on inlays done on firearms. If anyone has questions or would like to discuss this topic or any other gun engraving topic feel free to contact me.

http://www.jimblairengraving.com/
                          Raised gold eagle and rabbit, flush inlaid border on a Sharps
                          Flush gold inlaid eagle and borders on the barrel of a Sharps
 Floor plate of a Winchester model 70, raised and sculptured Thompson Gazelle with flush arabesque leaves and stems.
                   Same floor plate as above but blued and selectively French grey.
 Knife made by T.A. Overeynder, Flush inlaid gold arabesque scroll with shadows and shading to make it stand out on the stainless steel bolsters.
   Colt Single Action Army with raised and flush inlays of gold, silver and iron.
 Nose cap of a Winchester Model 63. Inlays are flush, raised and sculptured. They are inlaid with 18k and 24k golds, green gold and platinum.
Flush gold inlays with the hammer, trigger and magazine release gold plated.
                             The same Winchester nose cap before it is blued.

Friday, June 17, 2011

Engraving, the art and craftsmanship. The scroll.

Engraving pertaining mostly to firearms involves not only skill in the use of the graver but a certain amount of artistic aptitude.


When commissioning an engraving several things need to be looked at. The most obvious mistakes will show without close scrutiny. When observing the scroll, they should flow smoothly, no interruptions due to  "elbows" in the scroll. The scrolls should flow off of each other letting the eye of the observer easily trace the path of the scroll.

The flow of the scroll is defined by shading or lack of shading. The flow can be developed along the backbone of the scroll by leaving the area clean of any shading. This develops a clean area which I refer to as white. This white line allows the observer's eye to follow it without abrupt interruptions. The white flow line will intersect and interact with other flow lines. This will give the scroll interest and movement. The shading of the scrolls will also give flow in the same way. The shading is the opposite. It will give dark lines to follow. With more elaborate scroll there can be both light and dark that give good flow in the scroll.

Different types of scrolls may have their own rules for flow, but that flow will be there. With traditional small English scroll there is a flow, it is sometimes harder to see. When this scroll is enlarged and elongated the flow is easier to see. I personally like the beauty of an elongated English scroll. With the English scroll the flow lines are produced more by single cuts that anything else.

German Black Leaf or Arabesque is another traditional scroll. This scroll traditionally was open with the flow developed by the white stem lines connecting the leaves and flowers. Scrolls were developed originally from plant life forms. Many times these scrolls now uses both the dark and white lines to develop the movement of the scroll.

American scroll is generally a large and open scroll. The flow of this scroll is developed in the white back bone of the scroll. The leaves generally are led of off the backbone by a white line.This is not a hard and fast rule though.

Scroll engraving has deeply embedded roots. The individual engraver will inject their personality, likes and interest into the traditional scroll to make it more their own.

Engraving on guns is usually broken into panels. These panels are separated by borders or other parts of the gun. On more elaborate engravings the scroll can flow from panel to panel. The scroll can appear to go under the border of the panel or interrupt the border to go into the next panel.

To view examples of these scroll and others visit http//www.jimblairengraving.com  .

Wednesday, June 8, 2011

profile photo and Colt knife

I am slowly making some progress I have added a profile photo. This is a photo of a Colt made knife for the Colt Collectors Association. The Colt logo is a bias relief and sculptured. The flowing arabesque scroll work is cut deep and sculptured by the cuts. The tools I use for this type of engraving are a flat and a 110 degree square graver. The knife is a stainless steel. This particular stainless seemed gummy. At least it was not like gun stainless steel and would quickly wear out or break my gravers.

Monday, June 6, 2011

New start

http://www.jimblairengraving.com/firearms?articleTitle=jennifer%27s+winchester+model+63--1300395060--59--firearmsThis is all new to me. Never have I done a blog so here goes nothing. I would like to publish a new photo of engraving once a week but may be every other week or so. At some point I would like to discuss lettering as it applies to the art of engaving